






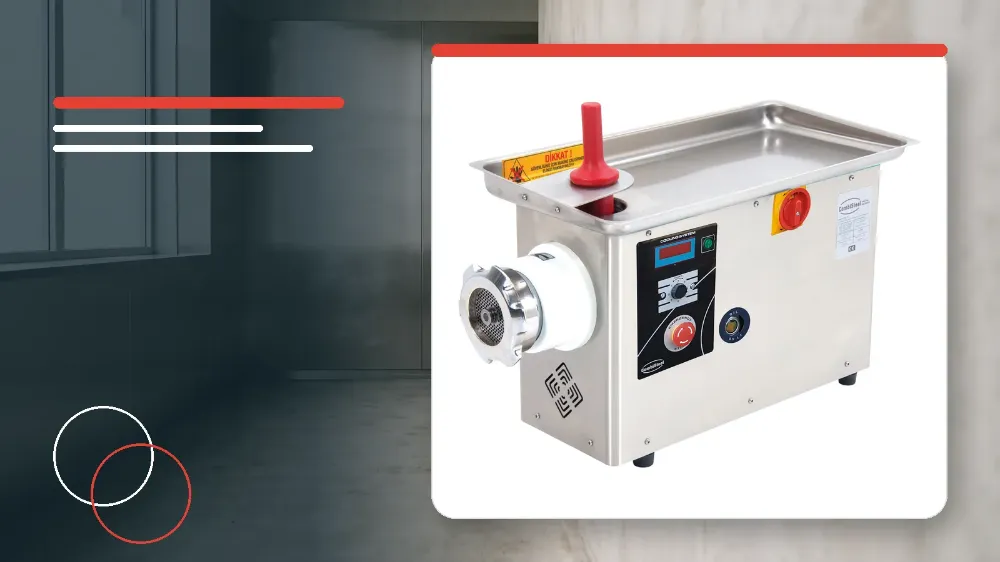
To safely clean and sanitise the Combisteel 7054.0066 meat grinder, verify that all meat has cleared the barrel, switch the main control to 0, completely disconnect the electrical power plug, dismantle the head assembly in strict consecutive order (lock nut, plate, blade, and worm), wash the components using warm suds while avoiding pressurized water, dry all parts immediately, and reassemble with the cutting edge facing outward and the plate aligned to the lock nut pin.
Applies to
This operational cleaning and hygiene protocol applies specifically to the Combisteel 7054.0066 commercial meat grinder model.
Before you start
- Trained catering staff must ensure that all meat processing operations are complete before preparing the unit for sanitation.
- Operators must confirm that no unprocessed meat or minced residue remains inside the mincing chamber prior to turning off the machine.
- The operator must turn the main power switch to the 0 position to halt the appliance.
- The electrical power supply must be disconnected and the electrical plug removed from the wall socket before commencing any cleaning or physical handling.
- Personnel must prepare warm water, hot water, approved suds, and dedicated clean drying cloths before dismantling the cutting group.
Safety warnings
- Never attempt to clean, wipe, or service the meat grinder while the machine is operating.
- Do not clean the meat grinder or its electrical motor housing with pressurized water under any circumstances.
- Always isolate the electrical power supply and unplug the machine before reaching into or handling internal parts.
- Avoid prolonged wetness or leaving components wet, as moisture exposure can lead to equipment deterioration.
1. Shutdown and Electrical Isolation
Safe sanitation of commercial mincing machinery begins with rigorous electrical isolation and clearing leftover food matter.
Operating staff must verify that all raw meat product has passed entirely through the cutting housing so that the barrel is empty.
The operator must rotate the main control switch directly to the 0 setting to power down the motor completely.
Physical disconnection of the power lead from the mains outlet is mandatory before touching any interior tooling.
- Inspect the feed throat and cutting assembly to verify that no residual meat or mince remains inside the machine.
- Turn the main operating switch to the 0 position to shut down the grinder.
- Switch off the wall supply, disconnect the electrical power supply, and pull the plug out of the electrical socket.
2. Step-by-Step Disassembly Procedure
Dismantling the cutting group in the exact manufacturer sequence protects internal drive splines and prevents operator injury from sharp components.
Before removing mechanical parts, any accessible residual meat remaining in the cutting section must be carefully cleared away.
The mincing components must be drawn out sequentially from front to back without forcing the mechanism.
- Clear out any remaining loose meat fragments lodged within the cutting zone.
- Unscrew and remove the outer lock nut from the mincer head barrel.
- Carefully slide the perforated mincer plate away from the central shaft.
- Carefully extract the four-bladed cutting knife from the drive stud.
- Pull the internal feeding worm screw straight out from the mincer housing.
3. Washing, Degreasing, and Immediate Drying
Thorough manual washing with approved detergent suds removes animal fats, organic residues, and bacterial contaminants from food-contact surfaces.
Different sections of the appliance require specific water temperatures and cleaning tools to maintain hygiene without damaging the motor enclosure.
Immediate manual drying of every washed part is essential to prevent moisture retention and equipment damage.
- Wash the dismantled mincer parts thoroughly using soapy suds.
- Dry all washed mechanical parts immediately after cleaning to prevent any exposure to moisture.
- Wash out the internal worm slot using soapy suds and warm water.
- Wipe down the stainless steel loading tray and the safety metal sheet using a cloth moistened with hot water and suds.
- Clean the outer machine body and the ventilation openings using a damp cloth, ensuring no pressurized water is ever applied.
4. Correct Reassembly and Alignment
Reassembly must only take place once every component has been dried completely following the wash cycle.
The internal components must be reinstalled in the exact reverse order of removal to ensure smooth mechanical operation.
Correct blade orientation is critical, as the cutting edges must face outward towards the mincing plate to cut meat properly.
Improper torque on the lock nut can mash meat if too loose or fracture the blade and plate if overtightened.
- Verify that all internal parts, housings, and fasteners are completely dry before mounting.
- Insert the feed worm back into the grinder head barrel so that its drive stud faces directly outside.
- Fit the cutting blade onto the quadrangular bulge of the worm stud with the cutting surfaces facing outward toward the front.
- Mount the chosen mincer plate over the shaft, ensuring that the plate aligns correctly to fit the locating pin of the lock nut.
- Thread and tighten the lock nut onto the barrel firmly to prevent mashing meat while avoiding overtightening that could crack the blade or plate.
Stop and get help if
- Stop all cleaning or maintenance immediately and disconnect the electrical power supply if the machine is found plugged in or running.